


Email Notification
This page describes the email notification feature.
Email notification is available in various functions such as Notification, Deliver Teaching Materials, Report, Questionnaire and Test. Email notification is available in each function or the operation menu during new registration or after registration.
Email Notification (new registration)
An option to send email appears on the screen of each function (Notification, Deliver Teaching Materials, Report, Questionnaire or Test) for new registration. Choosing the option will display the email composition screen that lets you send email.
A screen is displayed to confirm whether or not to enable the email notification setting. Choose [Send a notification with e-mail] and then, click the [Register] button. The Report function is used in this example.

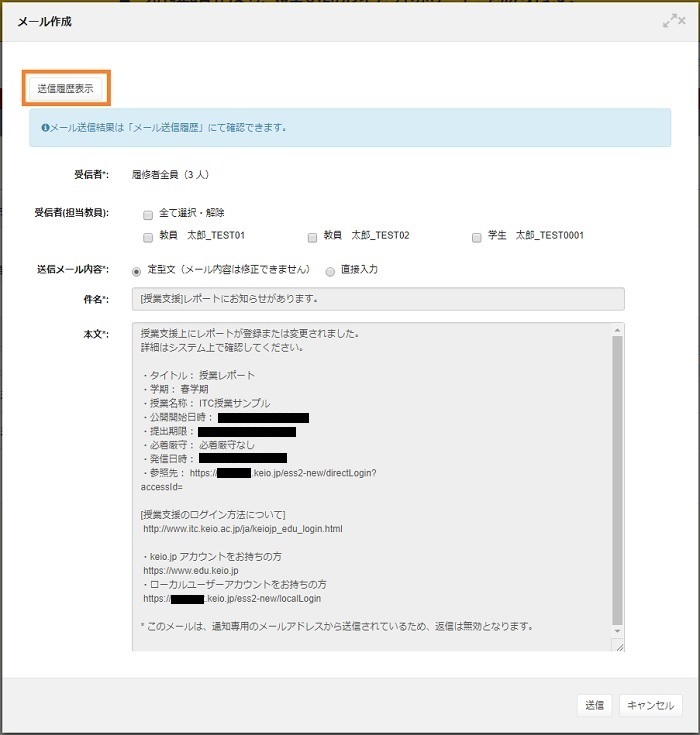
Template
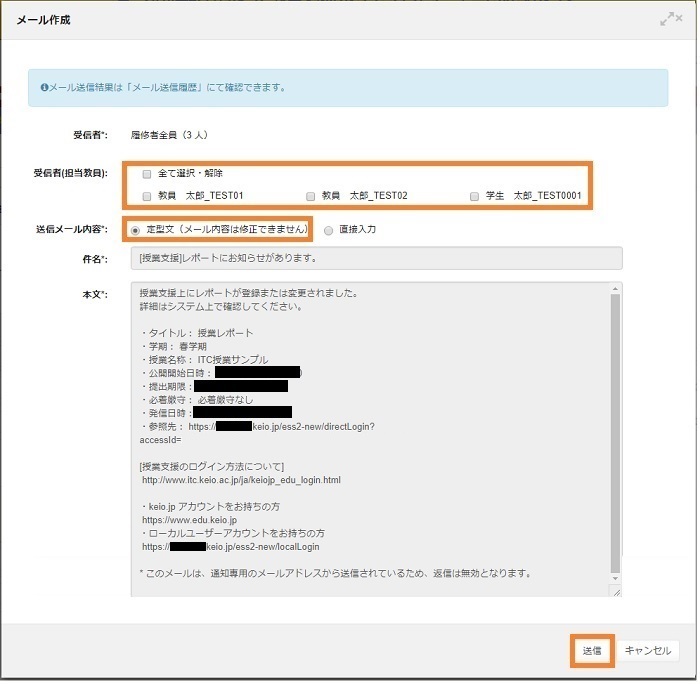
The email composition screen appears with the predefined standard text, which cannot be modified. Confirm the content, and then, click the [Send] button.
- [Recipients]
- All students who are taking the course.
- [Recipients (Instructor)]
- Select whom to send the email to: the person in charge of grading, and/or the co-worker in charge of the class, and/or the class assistant.
- [Content*]
- Choose either from Template (the content cannot be modified) or Direct Input. Free input lets you enter any text.
- [Subject]
- Enter the subject of the message. It cannot be changed when Template is chosen.。
- [Body]
- Enter the message. It cannot be changed when Template is chosen.。
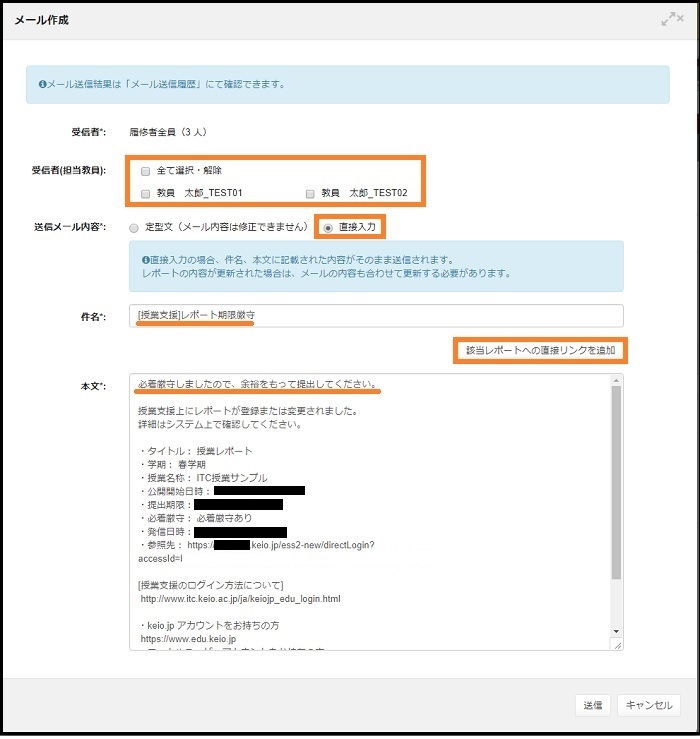
Direct input
Select Direct Input to input any text you want. Direct Input sends the entered message as is. For example, when you compose a new email and wish to use the same content as the email in the notification, change Fixed Text to Free Input.
- [Add direct link to message]
- You can add a link to the class data related to the email notification.
You can enter the subject and main body. The [Add direct link to message] button appears on the screen. Use it if necessary. After inputting the text, confirm the content and click the [Send] button.
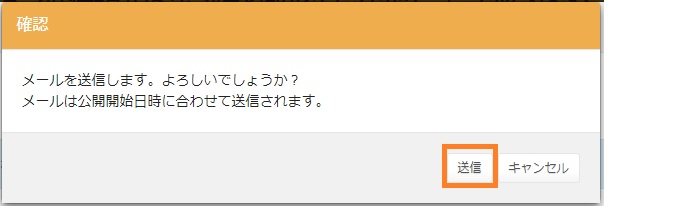
A confirmation message appears. Click the [Send] button.
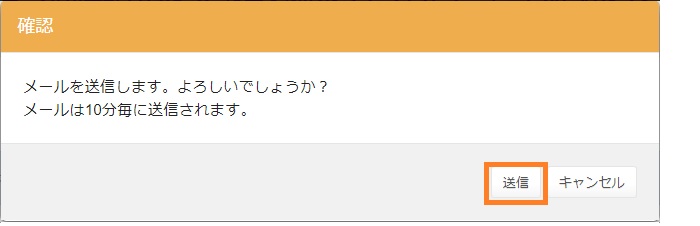
The email will be sent at the specified time when a future time is specified. In this case, the [Before send] status appears in the email transmission history.
See this page for details about the email transmission history.
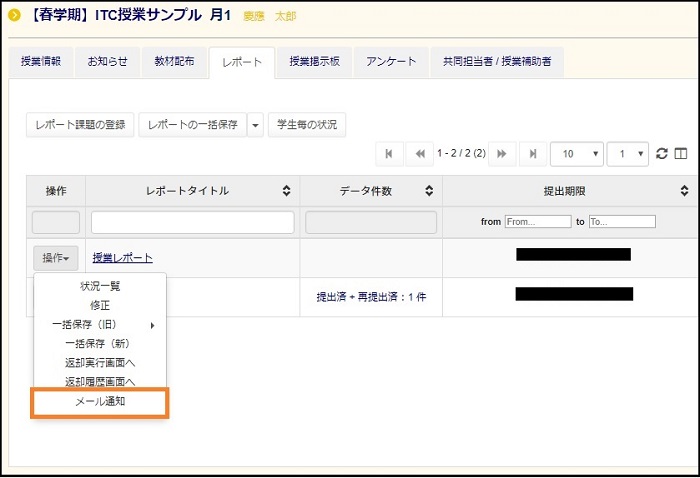
Email Notification(re-send)
Select [Send Email] from the [Operation] box for the class data that you want to send again.
The email can also be sent when class data is modified. The registration confirmation screen that lets you enable or disable email notification is displayed as with the case of new registration.
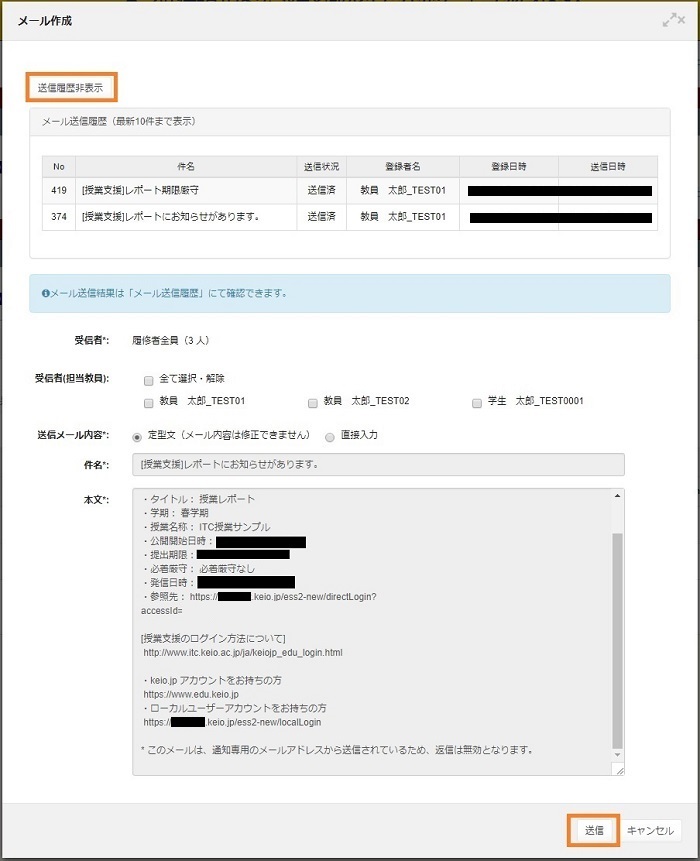
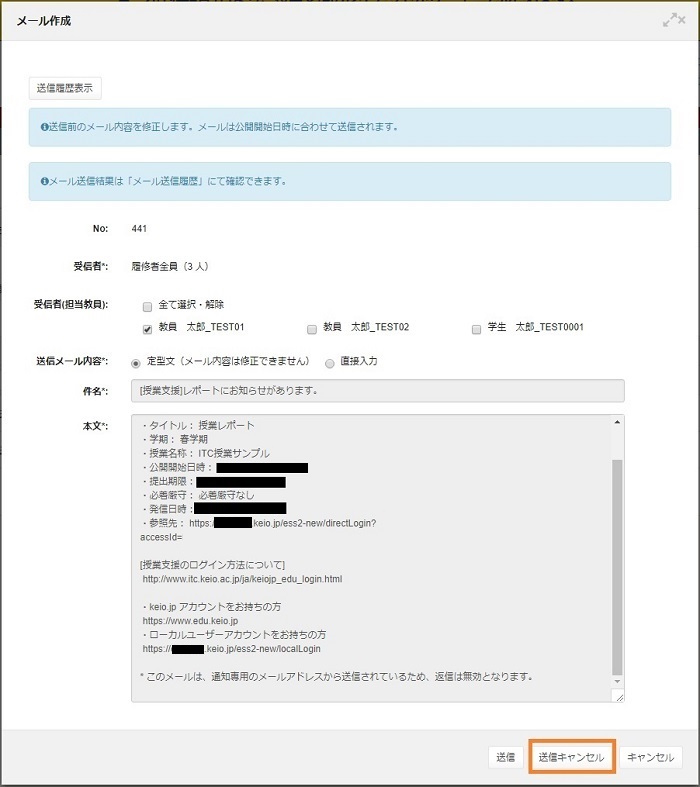
The email composition screen appears. On this screen, you can display the history of the sent emails. To check the history, click [Show history].
Confirm the content of the email notification. Click [Send] if there is no problem.
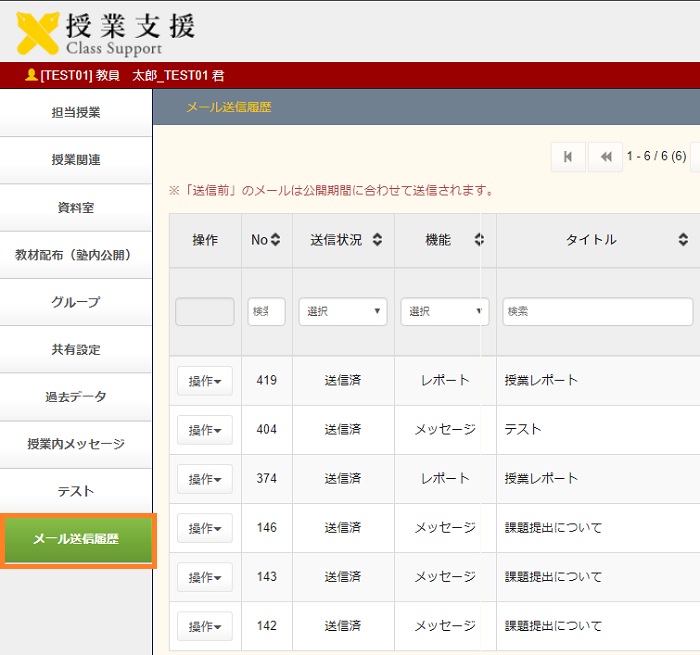
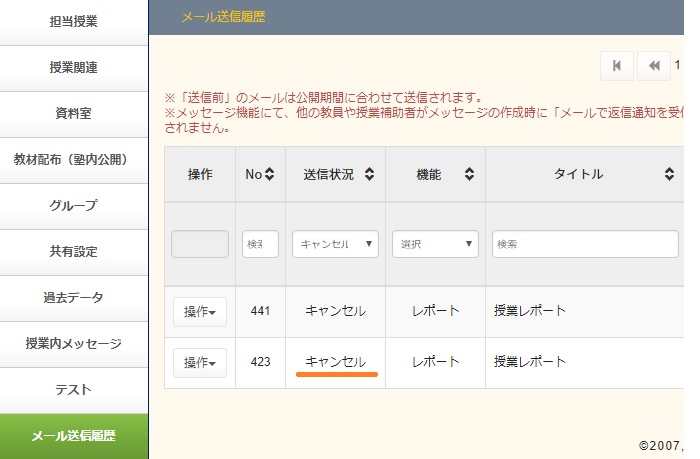
Email Transmission History
You can view the history of sent emails with this feature. Select the [E-mail list] in the menu at the left side of the screen.
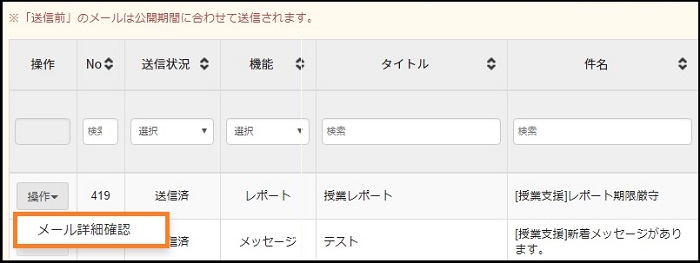
Check Email Details
Select [Detail] from the operation box of the email data that you want to check.
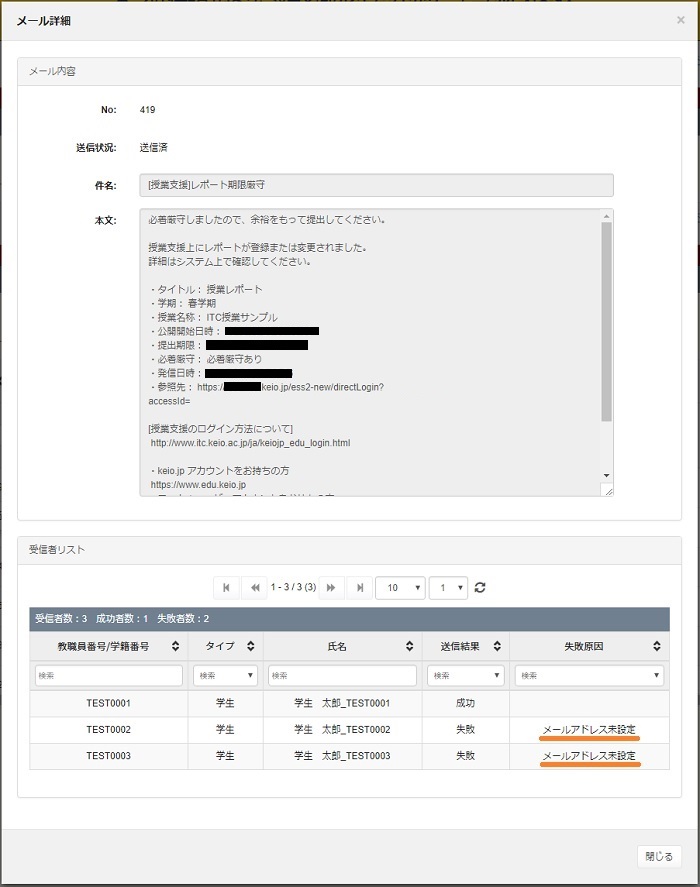
The email details screen appears. The content of the sent email is displayed. The recipient list lets you check the email transmission status.
- [Operation]
- Check email details: You can check the email transmission result and failure reason (if any). Cancel: You can cancel the transmission of the email that has been scheduled to be sent.
- [No]
- The system assigns numbers.
- [Status]
- One of the following statues is displayed.
・Send: Email has been sent.
・Before sending: A future time is set to the class data display.
・Sending: Email is being sent to a large number of students.
・Cancel: Email transmission has been cancelled. Email is sent in intervals of 5 minutes so that sent email can be cancelled if the system has not actually sent it. Email can also be cancelled when it is scheduled to be sent in a future time. - [Feature]
- Displays the name of the function that performs email notification.
The recipient list shows whether email has been successfully sent to students. If failed, the failure reason is displayed.
[Failure reason]
- Not sent: Email transmission process has been aborted (for example, due to server setting failure).
- System error: A system error occurred while sending the email.
- Invalid email address: The email address is not correct (e.g. abc@xx_abc.jp).
- Email address not specified: The user has never logged into the class support system.
Cancel Email Transmission
Because the system sends emails in intervals of 5 minutes, email can be cancelled if it has not been sent yet or it is scheduled to be sent at a future time.
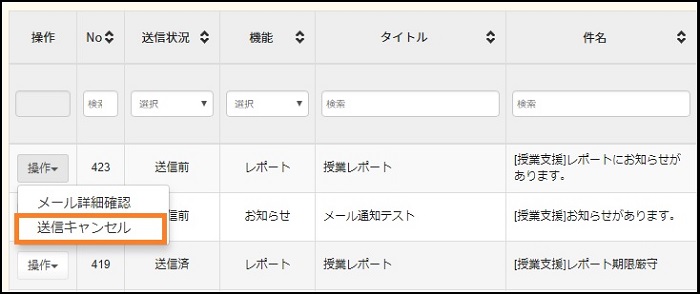
Cancel from Email list
Select [Cancel] from the operation section of the email data that you want cancel in the email list.
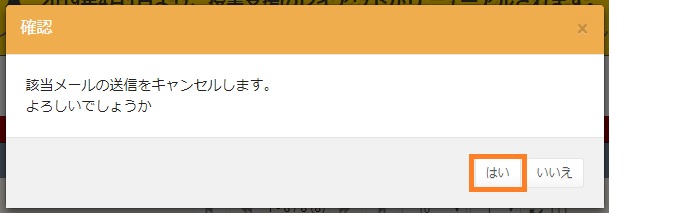
A confirmation message is displayed. Select [Yes] to cancel it.
The transmission status in the email transmission history changes from [Before send] to [Cancel]
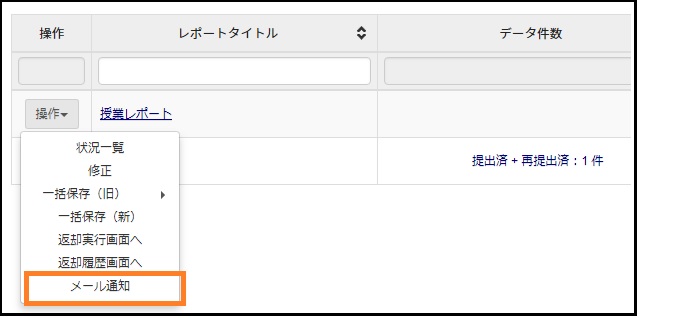
Cancel from Email Notification of Report
Sent email can be cancelled from the email notification of the report or when modifying the report. Select [Send mail] from the operation section of the report.
The email composition screen appears. Click [Cancel]
Cancel from Report Modification
A message is displayed when email notification is enabled on the report modification confirmation screen. Click [Modify].
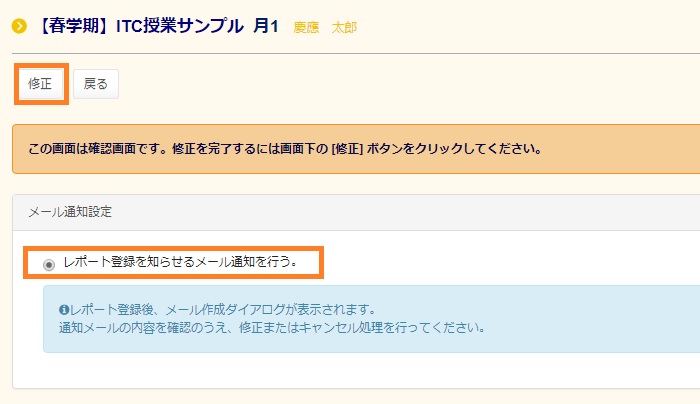
The email composition screen appears. Click [Cancel].
Email Notification Content (link)
This section describes the content of an email sent in the fixed text format.
If a faculty member clicks the link on the email notification of a message, the screen for faculty members appears.
Clicking the link in the email notification of each function (Notification, Deliver Teaching Materials, Report, Questionnaire or Test) will display the screen for students.
Teaching assistants cannot use the link feature as they are in charge of the class on an irregular basis.
Click the link as reference in the email notification.
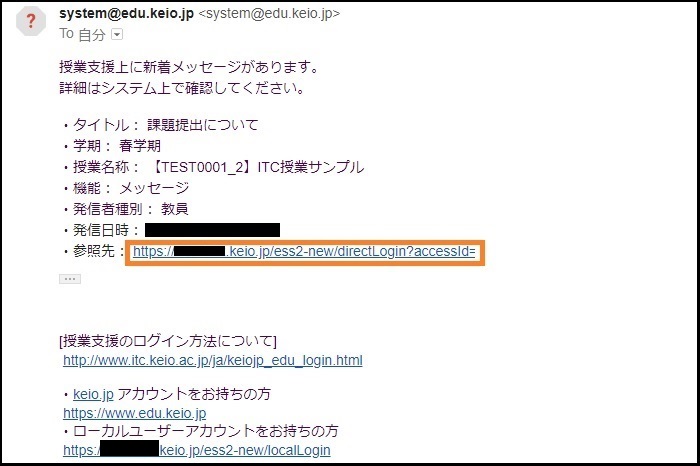
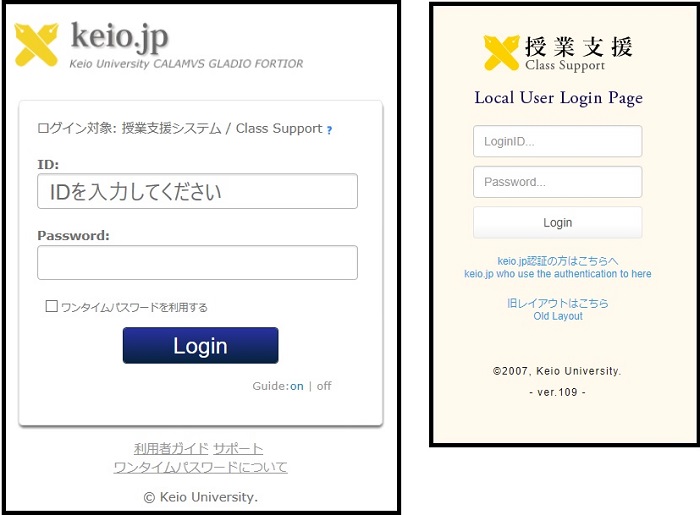
The authentication screen of keio.jp or local login page appears. Log in to the system.
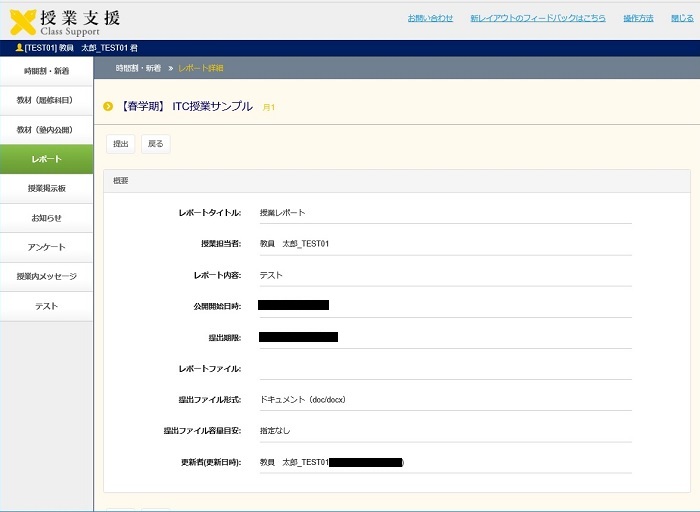
You can directly access to the linked class data.
Since a report function is used as an example, the student screen is displayed in this case.
Click [Close] at the top right of the screen to close the confirmation screen.
Last-Modified: May 15, 2020
The content ends at this position.