


Adding a member (direct addition)
Introduction
First, perform "Procedure 1: Allow posts by non-Keio IDs" . If this is already done, skip to "Procedure 2: Directly adding a member".
Procedure 1: Allow posts by non-Keio IDs
-
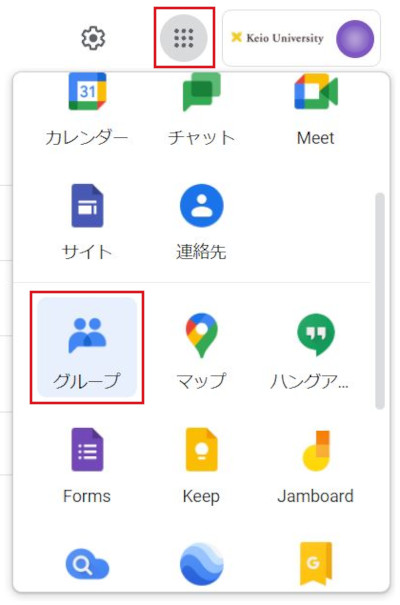
Select "Groups" from the Google applications.
-
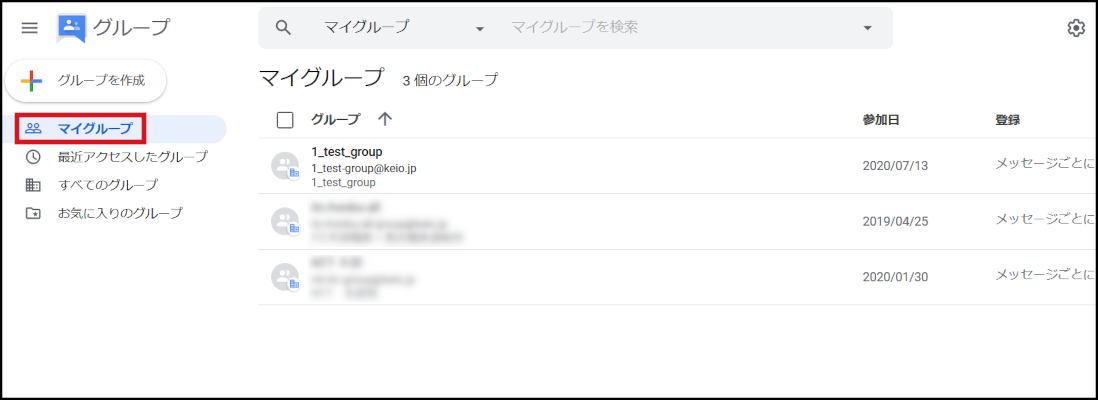
Click "My groups".
-
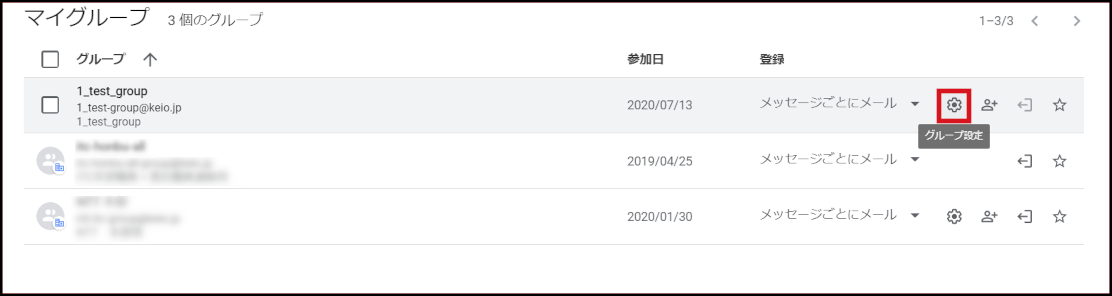
Click on the gear icon (Group settings) of the group that you want to make the settings for.
-
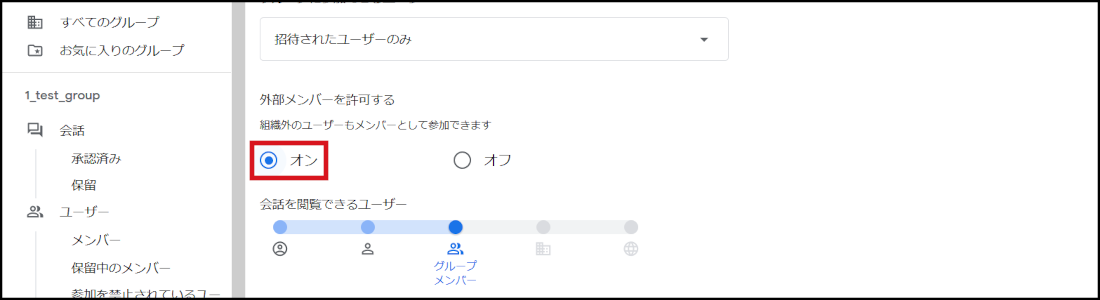
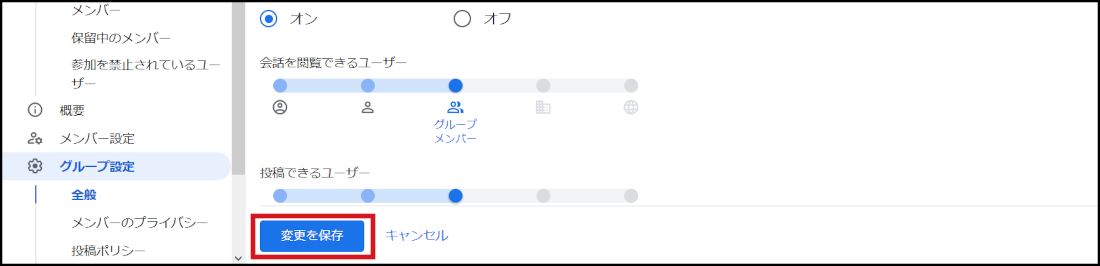
Turn on "Allow members outside your organization" in "General".
-
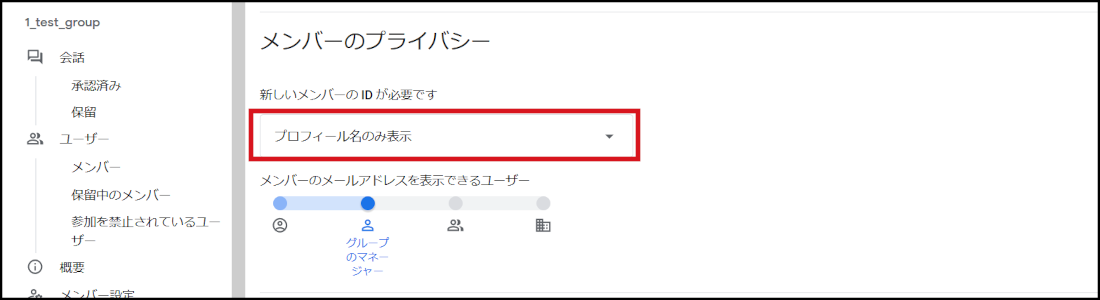
Choose "Display name profile only" in "Member privacy".
-
Click "Save changes".
Procedure 2: Directly adding a member
-
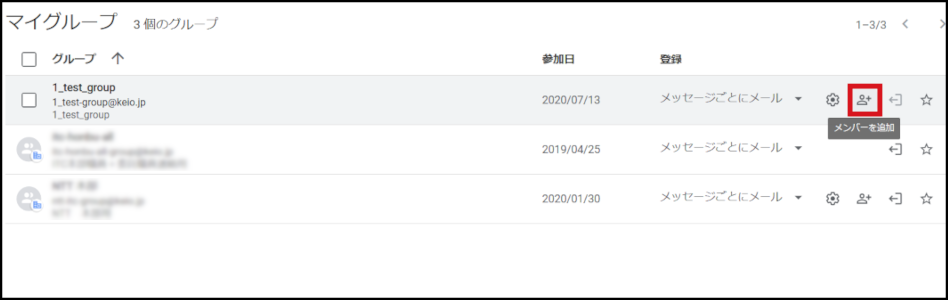
Click the "Add members" icon of the group to which you add a user.
-
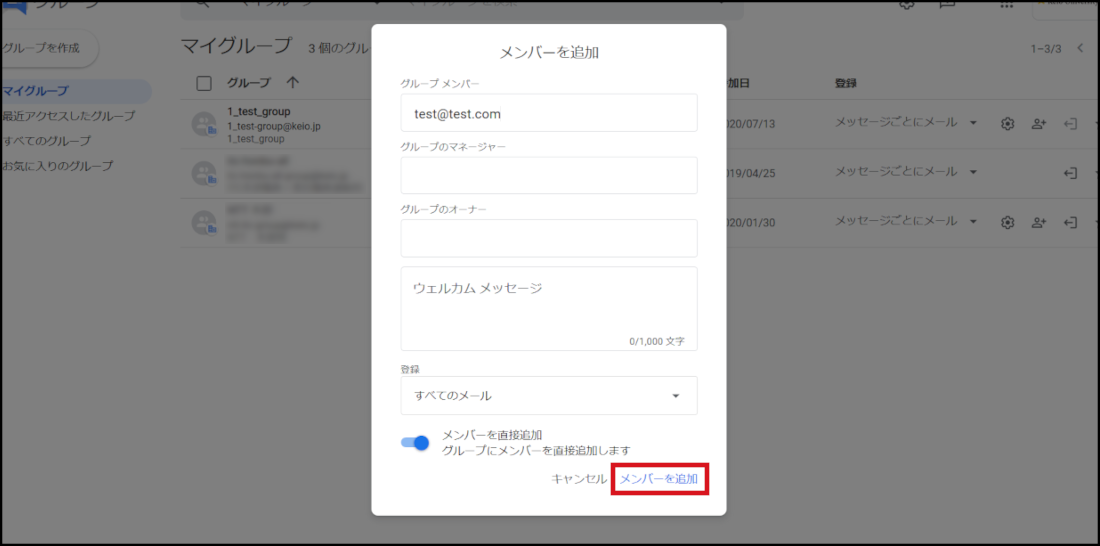
In the "Group members" field, enter the email address of the member to be added.
When adding a non-@keio.jp address, the "Welcome message" field must be filled.After completing entry, click "Add members".
-
A CAPTCHA screen appears. Enter the displayed letters and click "Continue".
(It is not displayed for Keio ID (@keio.jp) addresses.)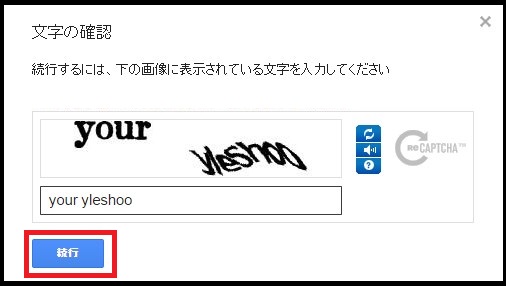
The member has been added.
Note: To non-@keio.jp addresses, a notification email about the member addition is sent.
Last-Modified: June 28, 2024
The content ends at this position.